Pages

The View from My Kitchen

Benvenuti! I hope you enjoy il panorama dalla mia cucina Italiana -- "the view from my Italian kitchen,"-- where I indulge my passion for Italian food and cooking. From here, I share some thoughts and ideas on food, as well as recipes and restaurant reviews, notes on travel, a few garnishes from a lifetime in the entertainment industry, and an occasional rant on life in general..

You can help by becoming a follower. I'd really like to know who you are and what your thoughts are on what I'm doing. Every great leader needs followers and if I am ever to achieve my goal of becoming the next great leader of the Italian culinary world :-) I need followers!

Grazie mille!
Showing posts with label Cooking Tips and Techniques. Show all posts

Wednesday, September 24, 2025

Is It Marinara Or Is It Tomato Sauce?

Either Way, It's NOT Gravy

It's been another bountiful summer for my small garden plot of Roma tomatoes. Too bountiful if you ask me...or my neighbors and friends. Or my barber. Or my mail carrier. Or total strangers driving by my house who run the risk of having me throw tomatoes through their open car windows. Anyway, it's time to make sauce again! But will it be marinara or tomato sauce? “Wait,” you ask, “there's a difference?” Oh, yeah.

Marinara is what most Americans think of as “spaghetti sauce.” But, for heaven's sake, please learn how to pronounce “marinara.” I don't know when, why, or how Americans started saying “mare-uh-NARE-uh.” I don't remember most people pronouncing it that way when I was a kid, but they do now and it drives me nuts. Sometime over the past fifty or sixty years this offensive mispronunciation has taken hold and it simply makes my skin crawl. It has the same effect on me as nails on a blackboard, especially when I'm assailed by it in so-called “Italian” restaurants. “So you want the mare-uh-NARE-uh with that?” Uffa! Che schifo! PLEASE eschew the flat, nasal and completely incorrect American pronunciation and use instead the rich, round authentic Italian “mah-ree-NAHR-ah.” Grazie mille.

I tend toward marinara because it's a simpler preparation and generally more useful for my purposes. Marinara is a quick-cooked sauce. Because of the shorter cooking time, it retains its bright flavor and vibrant red color. It's also a thinner sauce and it's a little more on the sweet side with just a hint of tartness. It lacks the depth of a longer cooking tomato sauce, but it's my go-to sauce for pizza and for simple dishes like spaghetti al pomodoro.

I said it's “quick-cooked,” and it's just that. I have a recipe here from Italian-Canadian chef David Rocco for a so-called “five minute” marinara sauce, something of a misnomer since the sauce actually takes about fifteen minutes to prepare and cook.


1 medium onion, chopped

1 clove garlic, chopped

4 tbsp extra-virgin olive oil

1 (28 oz) can San Marzano tomatoes, pureed

pinch dried red chili flakes

4 or 5 fresh basil leaves, torn

Salt

In a large saucepan, heat olive oil and add onions, garlic, and chili flakes. Sautè for 2 or 3 minutes. Add pureed tomatoes and simmer over low to medium heat for 10 minutes. Salt to season. Add basil in the last minute or two.

On the other end of the “quick” spectrum, here's a recipe from Rocco DiSpirito for his mama's marinara. This one takes about an hour, so it kind of straddles the line between quick-cooked and long-cooking:

1/2 yellow onion, finely chopped

3 cloves garlic, crushed or minced

3 tbsp olive oil

2 (28 oz) cans San Marzano tomatoes, crushed

1 tbsp tomato paste

1 cup chicken stock

1 cup water

1 tsp sugar

pinch of red pepper flakes

Kosher salt and freshly-ground black pepper, to taste

a few leaves of fresh basil, torn into small pieces

In a sauce pot or Dutch oven, heat the olive oil over medium-low heat and add onion. Cook for about five minutes before adding garlic. Cook an additional five minutes, or until onions are translucent and garlic is lightly golden. NEVER allow garlic to brown!

Add in the tomato products. Add the chicken stock, water, and sugar. Taste and season with salt, pepper, and red pepper flakes. Cover and bring to a simmer.

Simmer the sauce for about an hour, adding in the fresh basil during the last ten minutes or so of cooking time. The sauce will be fairly thin. For a thicker sauce, simmer uncovered until the sauce reduces to desired consistency.

Now, on to tomato sauce.

In classic French cooking, Sauce Tomat is one of the five foundational “mother sauces.” The French preparation varies from its Italian cousin in that it is generally thickened with a roux, a mixture of flour and fat (usually butter) and it also includes some kind of roasted or cured meat, like ham or bacon, which is rendered in for additional flavor. The French technique often employs chicken or beef stock to add to the depth, along with the aromatics, which, in French tradition, are called mirepoix rather than soffritto. And, of course, the French use less of those base Italian seasonings like garlic and basil and oregano. Lah-te-dah.

Anyway, this is a simple recipe for good old Italian tomato sauce.

1/4 cup extra-virgin olive oil

1 small onion, finely chopped

2 cloves garlic, finely chopped

1 stalk celery, finely chopped

1 carrot, finely chopped

Salt and freshly ground black pepper

1 (14-ounce) can diced tomatoes

1 6 oz can tomato paste

1/2 tsp Italian seasoning

1/2 tsp parsley

2 basil leaves, finely chopped

2 dried bay leaves, whole

1/2 tsp brown sugar

2 tablespoons unsalted butter, optional


In a large stock pot, heat oil over medium high heat. Add onion and sauté until soft and translucent, about 2 minutes. Add garlic and cook for an additional minute. Add celery and carrots and season with salt and pepper. Sauté until all the vegetables are soft, about 5 minutes.

Add juice from canned tomatoes by pouring through a strainer, then crush tomatoes and add pulp. Add tomato paste and seasonings and simmer covered on low heat for at least 1 hour or until thick.

Remove bay leaves and check for seasoning. If sauce still tastes acidic, add unsalted butter, 1 tablespoon at a time to round out the flavors.

If not using all the sauce, allow it to cool completely and pour 1 to 2 cup portions into plastic freezer bags or other freezer-safe containers. This sauce will freeze well for up to 6 months.

As you can see, a little more goes in to creating a tomato sauce. For one thing, you always use a soffritto of onion, celery, and carrot. This adds a depth of flavor and a natural sweetness.

The real secret to this layered, complex flavor, though, is the longer cooking time. A long simmer, usually for at least an hour if not two, will really allow for a deep flavor and a rich texture to develop in a way quick cooked sauces can't match.

While a light marinara is perfect for pizza or quick, simple pasta dishes, the heavier, heartier tomato sauce is great for something like lasagne or cacciatore or bolognese that require longer cooking and a sturdier sauce.

Now....(opening a can of worms) about “gravy.”

I like to attend local Italian street festivals. They're great fun, even though they're not always strictly Italian in nature. For example, the Festa Italiana I went to most recently featured a karate demonstration. Hey, nothing shouts “Italian!” like a good dojo. But, by and large, they really do showcase the heart of Italian-American culture.

You know how I could tell it was Italian-American rather than Italiano vero? I could tell because I saw a nice middle-aged couple walking around wearing matching t-shirts they had just purchased from one of the vendors. The shirts said “It's Not Sauce, It's Gravy.” I smiled, turned to my wife and said, “Solo in America è vero.” (Only in America is this true.) I don't think the couple understood me and they just went smilingly on their way, but it's a fact: only Italian-Americans – and a specific geographically limited group of Italian-Americans at that – ever refer to either marinara or tomato sauce as “gravy.” I don't care what your nonna called it, it is most decidedly not gravy.

By strict definition, a “gravy” – a word that has its origins not in Latin or Italian, but in Middle English – is a preparation made from meat drippings or juices. There's not even an equivalent Italian word for it. In Italy, a condiment that is poured over or mixed in to enhance the flavor of a dish is broadly referred to as a “salsa,” which directly translates to “sauce.” A preparation made by combining tomatoes and meat is sometimes called a “sugo” or a “ragu”. In central and southern Italy, a sugo describes a basic tomato-forward preparation while “ragu” is used in northern areas to describe a slow-cooked meat-based sauce. Northern or southern, nobody calls it “gravy” because the word doesn't exist.

So why do regional pockets of Italian-Americans call it gravy? Here's the most popular theory.

When millions upon millions of Italians began arriving on American shores around the turn of the twentieth century, many, if not most, were met with the traditional American greeting: prejudice. Hostility and bigotry were rampant. Descendants of enslaved Africans had already had their turn as objects of hatred as had the Irish and the Chinese. Americans needed somebody new to dislike and, since the Puerto Ricans and other Hispanics had not yet arrived, Italians bore the brunt. Especially those from southern regions whose darker complexions made them easier targets.

These folks quickly found that it was in their best interest to distance themselves from their “Old Country” roots. So, to “fit in” in their new surroundings, they started changing their names, often just dropping the final vowel or making the “e” “silent.” They learned at least some English and forbade the speaking of Italian dialects in their new American homes. And those rich sauces they used in their foods? Far too foreign for “real” Americans, who called the stuff they poured over their meat and potatoes “gravy.” And since we want to be real Americans, it's arrivederci sugo, e ragu, e salsa! Let's call those tomato and meat sauces we love so much “gravy” so our American neighbors will accept us.

And so “Sunday gravy” it became and “Sunday gravy” it remains. Even though it really isn't. Gravy, that is. However, along with the regional massacre of Italian words like “gabbagool” for capocollo, “mootzarell” or “mootzadell” for mozzarella, “rigot” for ricotta, and “prozhoot” for prosciutto, this is a fight on which I have long since given up. Knowledge and reason are ineffective weapons against, “That's the way my nonna said it and that's the way I'm gonna say it, so fugeddaboutit.” Pour on that “gravy,” baby, firm in the knowledge that absolutely nobody in the land that gave birth to your revered ancestors would have the slightest idea what the hell you were talking about.

Okay, so there you have the essential lowdown on Italian sauces, both the light and simple marinara and the more hearty, complex tomato sauce. Now, drive on by my house and roll down your windows.

Friday, June 27, 2025

Does Hot Food Need To Completely Cool Before Being Refrigerated?

It's All About Time and Temperature

Okay, tell me if you've heard this one: “You can't put that in the refrigerator. It's too hot. It has to cool down first.” Of course you have. If you're like me, you've probably heard it from your mother who heard it from her mother, who heard it from.....and so on, all the way back to the days of the “ice box.”

But does hot food really need to “cool down” before you put it in the fridge? The answer is a qualified “no,” with the qualification being the definition of “hot.”

Obviously, you're not going to take a casserole or something right out of a 350° oven and put it directly into the refrigerator. Condensation becomes an immediate issue, to say nothing of the risk of the thermal shock that would most likely occur should you take said 350° dish and place it directly on a 40° glass shelf, which most refrigerators have these days. Bad idea all the way around.

The other concern – that of raising the temperature inside the fridge – goes back to the days of the aforementioned ice box.

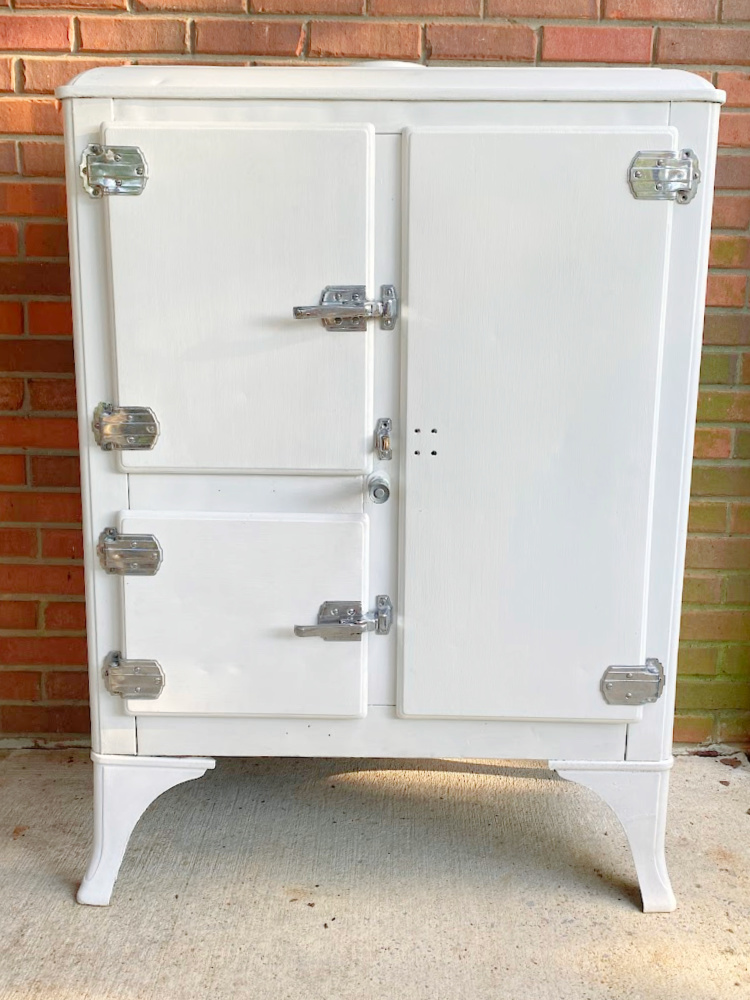
Ice boxes were just that: insulated double-walled wooden or metal boxes into which blocks of ice were inserted for the purpose of cooling food and/or beverages. The insulation consisted of straw, sawdust, cork, and sometimes even fur stuffed into hollow spaces between the walls of the boxes. Since pretty much everybody knew even then that warm air rises and cold air falls, large blocks of ice were placed in compartments located at the top of the box. The cold – well, cooler – air would sink downward, thus somewhat cooling whatever was inside the box. Of course, even well-insulated ice eventually reverts to its liquid state, so drip trays were located at the bottom of the box. These trays had to be emptied at least once a day, more often in hot climates or in hot weather.

The first commercially successful electric refrigerator came about in 1927. (An older model, introduced in 1910 and called the “Dumbbell”, failed to catch on largely because it cost $1,000 in a time when Joe Average made less than $500 a year.) Made by General Electric and called the “Monitor-Top,” it was an improvement on the old-fashioned ice box. But just barely.

Based on a concept developed by French inventor Marcel Audiffren, the Monitor-Top employed the same basic design as an ice box, except it had an electric compressor perched on top of the box instead of an ice tray. The compressor distributed coolant through a hermetically sealed system, so no more emptying drip trays. Unfortunately, early units often utilized toxic gases like sulfur dioxide, methyl formate, ammonia, or propane as coolants. And they really weren't all that cool.

If you put a fifty pound block of ice in the top compartment of an ice box, the upper portions of the box would cool to around 52 to 54 degrees, while the lowest part might get down as low as 42 to 44 degrees. The new-fangled electric models maintained about the same temperature levels. They were just more consistent about it since there wasn't any melting of the primary coolant involved. Basically, they were just big electric coolers. Freezer compartments were still a few years in the future.

And so it began: “don't put anything hot in the ice box,” as my grandmother still called it well into the 1960s, “because you'll warm up the inside of the box and everything in it will spoil.” That was true in 1925. Not so much a hundred years later.

Modern refrigerators are light years ahead of their predecessors in terms of overall design, construction, materials, compressor power, coolant, insulation …everything...and they can pretty much handle it when you stick a dish of warm leftovers inside without dramatically raising the interior temperature. Some of the newer units even have sensors built in to compensate for such changes in temperature. So go ahead and put your leftovers in the fridge while they're still a little warm. Really. It's okay.

The real issue is this: The first thing you learn in culinary school or when you open a restaurant is the “time and temperature” mantra. Boy, do they drill that one into your head! Ya gotta keep your food outta the “food danger zone.” That's the temperature range between 40°F and 140°F (some sources say 41°F to 135°F) where bacteria grow rapidly.

The FDA Food Code recommends a two-stage food cooling process. Cooked food has to be cooled from 140℉ down to 70℉ within two hours, then cooled down to 40℉ or lower in the next four hours. If the food has not reached 70℉ within two hours, you've either got to throw it out or reheat it and then cool it again. The total cooling time can't be longer than six hours or it's all just trash can fodder.

This is all especially true of what the experts and pros call “TCS Foods.” That means “time/temperature controlled for safety” food. TCS foods include meat and poultry; fish and shellfish; milk and dairy; eggs; leafy greens, and potato, rice, pasta, bean or vegetable dishes.

So don't take chances when cooling your food before you put it in the refrigerator. Basically, you've got two hours to bring the food temperature down from cooking temperature (above 140°F) to room temperature, (70°F) in order to eliminate the risk of pathogen growth. Then you've got another four hours to get it from room temperature down to 40℉ or less. The FDA also says that if you get the temp down to 70°F in less than two hours, you've still got the rest of the allotted time to get it down to 40℉.

Now, I don't think the peas are going to rise up and give you food poisoning if you leave them on the counter for a half-hour. The problem is it's really, really easy to get busy and/or distracted and forget about the stuff that you've left out to cool. And a half-hour becomes an hour and then two hours.....and that's when those innocuous little pisum sativum become little green monsters bent on wreaking digestive havoc. It's all fun and games until somebody loses track of the time.

The best thing to do is this; as soon as your peas, carrots, beans, potatoes, rice, meatloaf, baked chicken, fried fish or whatever stop being hot dishes on the table, stick 'em in the fridge. After sitting out on the table (or on the counter) while you're eating – say a half-hour to forty-five minutes – your food has probably cooled to pretty near that 70° mark. Stick a thermometer in it; you'll see. And if you really think that your refrigerator can't handle 70° food, (and it can), the USDA says you can rapidly cool it in a cold water bath before you refrigerate it.

But the best, most effective and most recommended way to rapidly cool hot food is to reduce its size. If you've got a big pot of soup or stew or a big hunk of meat or a large pile of mashed potatoes or something to deal with, portion it out into smaller containers. Spreading it out in shallow bowls or pans will help the heat dissipate more quickly. While you're working, leave the containers uncovered to reduce condensation and facilitate heat transfer. Then seal 'em up and refrigerate 'em.

Here's another cooling tip: while your food is sitting out on the counter awaiting its trip to the fridge, have it elevated on a cooling rack. The air flow all around the container will dissipate the heat faster than if you leave the bottom of the container in direct contact with the table or countertop.

And make sure your refrigerator is set no higher than 40F°. A couple of degrees cooler is even better. Better still is a refrigerator that has separate temperature zones. One of mine, for instance, has controls that allow me to set the meat drawer to a lower temperature than the main body of the fridge and to adjust the humidity in the vegetable drawer. If your fridge is warmer than 40°F, then it's really not much better than an old-fashioned ice box and all bets for food safety are off. Numbered dials inside the fridge are good but your best friend for accurate temperature control is a refrigerator thermometer. Five bucks at Walmart. C'mon! Splurge!

One more thing: try not to stack stuff in the fridge. I do it all the time until I think about it, but doing so can mess with the air flow in there and make your poor old chill-chest work harder to do its thing.

Bottom line: as long as you do it the right way, it's okay to refrigerate your leftovers while they're still a little warm. It's better than “leaving them out to cool” while you go binge watch four or five episodes of something, (“Oh! I lost track of time. I hope this stone-cold rice is still good”). And its easier than sitting there monitoring the cooling process with a thermometer, (“Nope. The mashed potatoes are still registering seventy-four-point-five degrees.”) It's easy-peasy.....or easy-rice-y or potato-y or whatever.

To refrigerate or not to refrigerate; that is the question. And now you have the answer.

Sunday, June 1, 2025

Air Is Your Enemy!

At Least Where Freshness Is Concerned


I had to wince the other day as I watched a friend “reseal” a resealable plastic bag containing shredded cheese. She took out a handful of cheese and then just zipped the bag closed and stuck it back in the refrigerator. “But isn't that what you're supposed to do with a resealable bag,” you ask? The answer is an emphatic “no!” When that bag went back in the fridge, it looked like a little plastic pillow. It was absolutely full of air.

I thought everybody knew better, but apparently I was mistaken. There is nothing that will render food stale or spoiled faster than prolonged exposure to air. Why do you think they make “resealable” bags in the first place? It's so you can seal in the freshness by sealing out the air. And my friend just sealed a whole bagful of air in with her shredded cheese.

Air, or more precisely the oxygen in it, causes all manner of nasty things to happen to stored food. “Oxidation” is what the scientific types call it, and it can make fatty foods go rancid and promote changes in color, texture and flavor in many other foods.

Biting into a limp, rancid-tasting potato chip is bad enough, but even worse things can occur in the presence of air. A sealed plastic bag full of air is a marvelous growth environment for airborne microorganisms like bacteria, molds and yeasts. And, since air usually brings moisture to the party, it's like a trip to the beach for those little critters that cause microbial spoilage. Which is, by the way, the number one cause of good food going bad.

Let's take that air-filled bag of cheese, for example. If my friend were to just leave that cheese out in the open air, it could start to spoil within a few hours. By sealing the air in with the cheese, she's pretty much guaranteeing a rapid decline in quality, to say nothing of safety. Refrigerating it is not the answer. All though it helps, some agents of spoilage aren't impressed by temperature until it gets down to sub-freezing levels. No, they'll just chill out and start covering the cheese with green and white mold. Next time she opens that bag...oooh, surprise!

Speaking, as we were, of potato chips, I'm sure you've noticed that they come packed full of air right from the factory. As a matter of fact, a common complaint is that there's more air in the bag than there is product.

But, it's not really regular ol' air that's taking up all that slack space, as they call it in the snack food industry. It's actually nitrogen gas. Seems that back around 1994, researchers discovered that exposing chips and such to nitrogen made them taste better for longer. So the industry started sealing chips in a nitrogen-infused environment to keep them crisp and tasty as opposed to soggy and nasty. Which is what you get when you open a bag of snacks and put it back in the cupboard or pantry without expelling all the air you let in when you opened the bag. No, you can't replace the nitrogen, but at least if you expel the excess air before you seal the bag with a chip clip or whatever, you'll preserve the taste and texture for far longer than if you trap air inside the bag. Same thing applies to cookies and crackers and snack cakes. They probably won't “go bad” as in “kill you deader than a hammer” bad or even make you sick as a dog bad, but they sure won't be as appealing after a few days in an air-filled environment.

And how about those leftovers you put in the zip-top bag? Did you just fill the bag with food and then top it off with a nice layer of air? Might as well have not bothered with zipping up the bag.

Same thing, by the way, if you're using plastic or glass storage containers with lids. Don't just snap the lid on after you fill the container. The makers of Tupperware used to highlight a little feature on the lids of their products that allowed you to “burp” them to get rid of any air inside before you sealed the container. You don't have to have a special “burp” button, just press down on the lid a little before you seal the bowl.

Whether it be cheese or chips or cookies or leftover veggies, it only takes a second to squeeze the air out of the bag – or bowl – before you seal it up. You have to develop the habit of doing it until it becomes instinctive. Muscle memory. Expel the air then seal the container. I've been doing so long that I don't even have to think about.

Now, I'm not saying you have to be a real fanatic about it. Just press or roll the bag until you get as much air out as possible. You're never going to get all the air out; just aim for doing the best you can.

Some folks swear by the water displacement method, whereby you partially seal your seal-able bag and then lower it into a pot of water, allowing the water pressure to push out any air in the bag before you finish sealing it. This is a tried and true method that works well with zip-top bags and such, but I wouldn't recommend it for sealing up an open bag of Doritos.

Then there are questionable tips like leaving an open corner and using a straw to suck the air out of the bag. Meh. That one's been around for a while. No less a resource than the venerable Good Housekeeping magazine actually recommended it at one time. But, I don't care if you just rinsed your mouth with a quart of Listerine, there's gonna be a few germs left in your oral orifice and do you really want to give them a free ride down into your leftovers? Just sayin'.

You could go off the deep end and buy a vacuum sealer. Greatest thing since sliced bread if you're into sous vide cooking (which I am) or if you buy in bulk and want to put stuff up for freezing (which I do.) As you might have guessed, I have one. But even I'm not dedicated enough to the cause of freshness to use it for day-to-day things. Besides the cost of endless vacuum sealer bags, I'm not sure how well the process would work with potato chips. I'm sure whatever crumbs would be left after the sealer got through with the chips would be undeniably fresh, but.....you know. (Actually, I saw a gadget online the other day – a mini bag sealer – that does nothing but seal the kind of bags that chips and snacks come in, but....really?)

No, just stick with pressing the air out and then sealing the bag/container as quickly as you can. As I said, you're not gonna get all the air out, but you'll do a helluva lot better of keeping your food nominally fresh than if you just chunk little air-filled plastic pillows into the refrigerator or pantry.

Remember, when it comes to food freshness and safety, it's far better to expel than to leave an air cell. (I know; it's a stretch but it's the best I could do.)

Wednesday, April 30, 2025

I LOVE Vincenzo and Everything On His Plate!

He Tells It Like It Is!


I've been writing these little bits and pieces of advice and opinion for over twenty years. I don't how it is that, up until very recently, I missed a guy named Vincenzo Prosperi.

Born in Abruzzo in 1983 and now living in Australia with his Australian-born wife, Vincenzo is the creative genius behind the YouTube sensation “Vincenzo's Plate,” which he launched in 2014. Vincenzo has amassed an enormous following across many platforms. Because I don't spend any significant time on social media, I stumbled upon “Vincenzo's Plate” quite by accident. I watched one video and immediately became a follower. I've since watched close to a hundred and have yet to find one I didn't like.

The guy could be a much younger version of me. Our philosophies on food are nearly identical. He eschews the title “chef” and instead prefers to be called a cook. He readily acknowledges the influence his nonna's cooking has had on his own recipes and techniques, and he is way beyond a stickler when it comes to preserving Italian culinary traditions. In short, he tells it like it is and doesn't care who he takes on or whose ego he punctures in the process.

His “reaction” videos are priceless. Watching him take on various TikTok and YouTube idiots who blatantly massacre Italian traditions in the name of “creativity” or “convenience” or whatever is absolutely inspiring.

You'll hear him say, “What is this 'Italian seasoning' they talk about? It's herbs like oregano and basil. It's used in all kinds of cooking. What's “Italian” about it?” Some TikTok cretin was getting ready to pour a pile of about six different spices into an “Italian” pasta dish. “Where am I,” he said, “in India? There's nothing Italian about this.” When somebody broke the spaghetti in half for a baked spaghetti, Vincenzo cried out, “Did you see that?! She just killed the spaghetti!” Preach it, brother!

And he is not afraid to go after the big guns, either. He has very little use for Gordon Ramsay, for example, and even though Guy Fieri and Buddy Valastro have Italian names, they didn't do well under Vincenzo's scrutiny. And I had to laugh at Vincenzo's reaction to Paula Deen. Her putting a dry burger patty between two Krispy Kreme doughnuts absolutely stunned and horrified him. He called her a “nightmare,” a sentiment with which I can identify.

Even when he is generally approving of somebody he's watching, like Stanley Tucci making aglio e olio, he still offers insightful criticism when he sees something wrong. Shame on you, Stanley, for wasting extra virgin olive oil by adding it to the cooking water. And thinly slicing the garlic is good, but mincing or crushing it is better because then you don't have to eat chunks of garlic.

In most of his videos, Vincenzo pointedly wears (and sells) t-shirts proclaiming the immutable facts that there is no cream in carbonara and no pineapple on pizza.

Besides his hilarious and spot-on take downs of the flaws and foibles in other peoples recipes and techniques, his own offerings on how to properly prepare various Italian dishes are master classes in the art. After watching him make spaghetti pomodori the other day, I had to go make some for dinner myself, pleased with the realization that we both make it exactly the same way. My wife was wondering why I was yelling, “Yes! Yes! Yes!” at my computer. It was because I was watching Vincenzo lambasting some moronic attempt at making aglio e olio and then demonstrating the proper method.

Like me – and any Italian cook worth the title – Vincenzo is a huge proponent of finishing pasta in the sauce. He correctly says that cooking the pasta first and then dumping the sauce on top is a crime against good food. “The pasta dries out,” he says, “and it dies. It sits on the plate and it's dead.”

Neapolitan pizza dough, tomato sauce, cacio e pepe, Italian meatballs, gnocchi, lasagna, ravioli, arancini, bruschetta, tiramisu, cannoli.....and so much more. All done in the classic Italian style with no tolerance for “variations.” You wanna put cream and peas in your carbonara? Fine. But don't call it “carbonara” because it's not. Some YouTube boob will proclaim that Italians use garlic in everything. Vincenzo will call “stronzate” on that and show you how to use garlic with restraint, the way real Italians do.

The subtitles accompanying his videos are unintentionally funny in and of themselves. His accent is quite thick and whoever captions him often does it so badly that the English captions sometimes require English translation. For instance, in one video he said “spaghetti aglio e olio” but the caption read “spaghettio.”

Even though he lives in Australia, Vincenzo is proudly and passionately Italian and considers himself to be an ambassador for Italian culture. He finds inspiration in all things Italian. He once was inspired to create a baked pasta dish after listening to Andrea Bocelli and Ariana Grande sing “e più ti penso,” the inspiration coming from Andrea's classical Italian authenticity combined with Ariana's more contemporary approach.

So, I could go on talking about Vincenzo and “Vincenzo's Plate” for several more pages but why don't you just go and discover him for yourself? He's on YouTube and Facebook and all the popular platforms, but just Google “Vincenzo's Plate” and you'll find him. When you do, I promise you'll become a follower.

Thursday, March 27, 2025

Serving Pasta The Authentic Italian Way

There Are A Few Old Traditions Worth Hanging On To


Okay, before we start, let me make this disclaimer: for all of you who are about to go the the “comments” section and scream about having the “right to do whatever the f**k I want with my food” or to castigate me for being a fussy, rule-bound old prig, let me say this: you do, and I am. There. With that out of the way, let's talk about the authentic Italian way to serve pasta.

There are two keys to serving authentic Italian pasta, and I'll get to them in a minute. But first, there are some basic pasta cooking rules that you've probably seen repeated over and over. However, because I am, indeed, a fussy, rule-bound old prig, I'm going to repeat them yet again.

Prima regola, don't break the pasta. Go ahead, I'm braced for it. “What difference does it make? It all tastes the same anyway. It fits better in my pot when I break it. It's easier to eat when it's broken up.” Does that about cover it? Good. Now, the explanation. Long pasta is long just because it's supposed to be long. It's part of the aesthetic of the dish and part of the cultural experience and tradition of making it and eating it. Some say that breaking long pasta is an insult to the skill and the craft of the pasta maker. Since most of what you buy in the store these days is machine made, I don't know how insulted the machines might be, but why take the chance? Bottom line? It's an Italian thing. Some rules are immutable and “don't break the pasta” is one of them. Or break it if you want. After all, you're gonna tell me it's your “right,” and it is. But it's not authentic and authenticity is what we're talking about here.

Secondo, salt the water. The only time you really get to enhance the flavor of pasta is in the cooking process. The pasta literally opens up during cooking to release starches and to take on flavor. After it's done, you can pour all the salt in the world on it and it's just gonna taste like salty noodles. Generous amounts of salt added to the water – about a tablespoon per quart – while the pasta is cooking is the only means of imparting proper seasoning to the finished dish. And save a little of the cooking water to help develop your sauce. The starchy, salty water acts as a flavoring and thickening agent that aids in the ability of the sauce to cling to the pasta as it enhances the overall taste of the finished dish. And you obviously don't want to rinse your pasta. You need some of that starch.

And while we're sort of on the topic, I'd like to find the old wife behind the old wives' tale about putting oil in the water to keep the pasta from sticking. Chemistry 101 says oil and water don't mix. All you're going to get is oily water.

Ultima regola, don't cook the pasta to mush. Al dente is the key. It should be a little firm “to the tooth” when you bite into it. If you want to overcook your pasta until it looks and tastes like something out of a Chef Boyardee can, go for it! It's your right. But it's not authentic.

And now that brings us to the first of those two keys to the authentic Italian way of serving pasta.

I'm old but I'm not old enough to remember how Americans ever came up with the notion of piling a heap of cooked spaghetti on a plate and then dumping a quart of sauce on top of it. But there it is; the typical American way of serving “spaghetti.” I guess it goes back to the early days of the Italian diaspora when everything Italian was still considered mysterious and exotic. Nobody outside the Italian enclaves knew how to cook the stuff, so they just punted. And that's what they came up with.

Now, I can give a little leeway to home cooks because, as I've acknowledged, you can do whatever you want with your food at home. It's the so-called “Italian” restaurants that really gripe me. If you run a place called “Vincenzo's” or “Giuseppe's” or “Lorenzo's” or “Giovanni's” and you serve pasta this despicable way, you should be stripped of your Italian heritage and the final vowel in your last name and you should just call your place “Vincent's” or “Joe's” or “Larry's” or “John's Place.” Because what you're doing ain't Italian and your mamma didn't teach you that way.

And I hear it all the time from Italian restaurant owners: “But that's what my American customers expect!” And I know. I can feel your pain. I once took over running a little American diner for a friend. And he offered a “spaghetti special” on Fridays, which I immediately remade in the authentic Italian way. For the most part, it was a great success, with patrons gushing with praise for the improved quality. Many said it was better than the Italian place down the street. BUT.....and there's always a “butt”.....I had one disgruntled dude who complained that what I put on his plate looked like “leftovers” because everything was “all mixed together.” He demanded his pile of plain spaghetti topped with a quart of sauce. I tried to patiently explain why I fixed it the way I did, but he wasn't satisfied and I never saw him again. He probably went to the “Italian” place down the street.

Anyway, in real, authentic Italian cooking, you always finish the pasta in the sauce. You never, EVER pile plain pasta on a plate and cover it with sauce. And if you're eating at an “Italian” place that does that, I'm telling you that they are just pandering to the lowest common denominator. Don't let 'em do it! Send it back and tell 'em, “Non insultarmi, stupido! Cucinalo come farebbe tua mamma!” Well, don't say it like that or you'll probably get thrown out. But you get the idea. Don't accept mediocrity.

There's a good reason we cook it the way we do. When you take the pasta out of the water a minute or two before it reaches that perfect al dente stage and let it finish cooking for those last couple of minutes in that delicious, flavorful sauce, the flavors – i sapori – of the pasta and the sauce will marry and mingle in a way that is simply not possible to achieve by dumping them on a plate separately. The pasta has already released its starches and opened up to absorb the salt you've added to the water and now it's going to further accept all the nuances of that full, rich sauce. É semplicemente il migliore! It is the considered opinion of anybody with even a drop of Italian blood in their veins that there is nothing worse than a pile of bland, flavorless spaghetti sitting and cooling helplessly on a plate while somebody drowns it in some thin, unremarkable sauce. And yet, that is the typical American standard “spaghetti dinner” preparation and Italians will weep for you.

Yeah, so I'm a little dramatic.

The other key to serving pasta the authentic Italian way is to leave it the hell alone!

In the scheme of Italian dining, pasta is a course in and of itself! You don't put anything “in” or “with” pasta. I can't tell you how many times I've been asked, “Would you like some chicken in that pasta, sir?” No, I don't want any frickin' chicken in my pasta! Chicken belongs to the next course, the secondo. This is the primo course and it's fine just the way it is. If you get nothing else out of this rant, get this, please: There is NOTHING wrong with eating a plain, unadorned, unadulterated dish of pasta and sauce.

In the traditional Italian meal structure, pasta dishes are paired with sauces that complement and enhance the overall flavor of the dish. Each ingredient plays its part in achieving a balanced outcome. Throwing chunks of chicken in there – or any meat or fish, really – throws that perfect balance out of whack. Those meats are considered secondary complements to the pasta, hence the term secondo. You serve them by themselves, or maybe in conjunction with the contorno, or vegetable, course, after, but never mixed in with, the pasta course. That's why you'll never find something like chicken Alfredo on an authentic Italian menu. Well.....you'll never find anything Alfredo on an authentic Italian menu, but that's another story. No “chicken tortellini,” no “chicken carbonara.” And Olive Garden's “Tour of Italy” is a visit to a place that simply doesn't exist. “A trio of Chicken Parmigiana, Lasagna Classico, and Fettuccine Alfredo on one plate!” There's so much wrong with that picture that I scarcely know where to start.

Putting aside the actual non-existence of chicken parm, you'll never find a “side” of pasta on a plate next to anything. Pasta is pasta and chicken is chicken. They don't belong together on the same plate. Neither does steak or pork chops or salmon. You don't mix meat with pasta and you don't serve pasta “next to” meat. That doesn't mean that meat can't be an ingredient in a pasta dish, like the pancetta or guanciale in a carbonara, but you wouldn't just slap a hunk of ham on a plate of pasta. Same goes for beef, pork, or veal in a Bolognese or in a ragu served mixed with pasta. But you don't, for instance, put hunks of meat – lookin' at you, meatballs – on top of a plate of spaghetti. And, while you might find some broccoli florets perched on a plate next to your 8-ounce sirloin, you'll never see a “side” of spaghetti there. At least you won't in madre Italia.

Okay, pluck the chickens and warm up the tar. I'm ready for the onslaught of commentary about how Italians are nothing but stuffy, pedantic, ultra-purist, hyper-critical pettifoggers and how food is food and you can fix it any way you damn well please. É vero! And you can wear white after Labor Day, wear socks with your sandals, and drive twenty miles an hour over the speed limit, too. Ain't freedom grand? All I'm sayin' is that authenticity usually comes with rules and that Italian culinary customs have developed over many generations. And that maybe, in this ever-changing world in which we live, there are a few old traditions worth hanging on to.

Sunday, January 5, 2025

An Egg Cracker? Really?!

Sorry, But I've Got To “Counter” This Recommendation


It's been a slow afternoon, and as I was scrolling through some useless stuff on the Net I came across a piece on the best way to scramble eggs. Since I've only been doing it for over a half-century, I thought I'd take a look and see what modern innovations may have revolutionized the process. And, lo and behold, the first “need” the young author presented in her list of essentials (all available for purchase on Amazon and various other outlets, by the way) was an egg cracker.

No. Really, An egg cracker.

For only nine bucks, it's something I never knew I needed. Imagine, I've been struggling to cook scrambled eggs, both at home and in the professional kitchen, for decades and now I realize that I've only been making things harder on myself by not possessing an egg cracker. I feel so utterly inadequate now. I hereby apologize to all the people to whom I have presented obviously sub-par scrambles owing to my egregious lack of proper equipment.

Seriously, this little gadget looks like a spoon rest with a raised ridge in the middle of it. In fact, the author notes that you can use it as a spoon rest when you're not using it for egg prep. So it's a multi-tasker! Yay! “It can help you cleanly break shells into a straight line," she enthuses. "All you do is crack your egg against the center ridge, then pour the whites and yolk into a bowl.”

I already have a similar device in my kitchen: it's called a countertop.

Now, I don't have one of these things in my hand, but looking at the picture it seems to me that the little ridge in the center would have the same effect as the edge of a bowl in that it would not necessarily “cleanly break” the shell. The preferred better and safer method of egg cracking is to give the egg a firm tap on a flat surface – like a countertop. The egg-sperts – see what I did there? – say this method is far less likely to drive little shards of shell and any possibly contaminating bacteria into the interior of the egg.

Every culinary school graduate I know uses a flat surface for breaking eggs rather than striking them against a sharp corner or the edge of a bowl. Even though you see the occasional TV chef employing that practice, I promise you it's not what they were taught in school. I've even run across a few people – very few – who break their eggs by smacking them together. Okay, fine. But what if you're only cracking one egg?

My mother and my grandmother and probably their grandmothers, too, cracked eggs on the edge of a bowl. It's intuitive and it's how most home cooks roll. I don't know when the “better,” “safer” method was discovered/developed/decided upon among professional cooks, but it's the one they teach now and it's the only one I use/teach as well.

Once you crack the shell, techniques for the messy part - breaking the egg open the rest of the way – vary according to the preference and skill level of the cook.

I can open an egg one-handed. It's not really hard. It just takes a little practice. You hold the egg in your hand with your thumb placed along one long side of the egg and your fore and middle fingers on the other. Bring your pinky and ring finger to the bottom side and press the bottom of the egg into your palm. Crack the egg against a flat surface, then, in a slight twisting motion, use your thumb and forefinger to lift the top half while using your ring finger and pinky to pull down on the bottom half. If you've cracked the egg cleanly, it should separate cleanly and everything will come out without any shell fragments. 

I seldom do it this way, unless I'm trying to be showy or something. Most of the time, I do it the way everybody else does: after cracking the shell on a flat surface, you lightly press the tips of your thumbs into the crack until the egg's keratinous outer and inner membranes break. Then you just gently pull the shell apart and the white and yolk parts will slide out into your waiting bowl, hopefully intact. And, by the way, while not absolutely necessary, it's always a good idea to crack eggs into a separate bowl before mixing them together for your scramble or omelet or cake batter or whatever. Reason being, if you get a bad egg – which can sometimes happen – you can isolate it before it mixes in with other eggs and ruins the whole works. And it's easier to fish a stray bit of shell out of one egg than it is to fish it out of two or three or more.

So, there you have Egg Cracking 101. And it didn't cost you a penny.

The advocate of the nine-dollar egg cracker, who identifies herself as a “Senior Editor, Home & Garden” goes on to recommend a wide variety of bowls, whisks, spatulas, pans, holders, cookers, containers, add-in ingredients, and more, all of which are only a click away throughout her article. Fine. Everybody has got to make a buck. But if you've got a bowl, a balloon whisk, a silicone spatula or a wooden spoon, and a non-stick pan, you've pretty much got everything you need. The most essential thing you'll require to make outstanding scrambled eggs is practice and you can't buy that online.

You can buy an egg cracker, though. But, really, don't. 

Saturday, June 17, 2023

Don't Waste Money On Precooked Bacon!


Money Can't Buy Happiness. But It Can Buy Bacon, And That's Close Enough


I've decided to stop turning around in the grocery store because it seems like every time I turn around, the prices have doubled. This is especially true for my favorite porky ambrosia and yours...say it with me now... “mmmm...bacon!”

I'm old enough to remember when bacon sold for sixty-five cents a pound. The good stuff is going for upwards of $7 a pound now. You can still get cheap store brands for less, but you usually get what you pay for, you know? I can buy restaurant quality bacon through a restaurant supplier and it costs me a lot less; in fact, I just brought home the bacon – five pounds of it – for about $16. You can, too. There are a lot of restaurant supply outlets across the country that are open to the public. They may not be as convenient as your neighborhood grocery store, but......

And, speaking of convenience, let's talk about precooked bacon. I love the stuff. It's like instant bacon when you want to throw a couple of slices on a sandwich or a burger or crumble it over a baked potato or in a salad. But who wants to spend the time and clean up the mess involved in cooking up two slices of bacon for something like that? Enter the modern marketing marvel that is precooked bacon.

As the package says, it's real bacon, fully cooked and ready to use. Just pop it in the microwave for a few seconds and it's good to go. Because the high salt content and cooking method preserve the meat from bacteria, precooked bacon is shelf-stable in the store and you just toss it in the fridge after you open it. It'll be good for at least a couple of weeks.

That said, if I balk at paying seven bucks for a pound of uncooked bacon, there's no way I'm going to fork over five or six dollars for a measly two or three ounce package of the precooked stuff. There are usually sixteen to eighteen slices of uncooked bacon in a one-pound package. The precooked stuff averages about ten slices per package. No way.

So here's what I do: when I bring home my five-pound pack of bacon, I prep it for freezing via the method I discuss elsewhere on this site. (See “Bacon Is A Terrible Thing To Waste”) But I separate out about a pound that doesn't go right into the freezer.

First, I start my oven preheating to 400° F. Then I grab a rimmed baking sheet (½ sheet pan) and a cooling rack to fit inside. I line the bottom of the tray with foil before setting in the rack just to make for easier cleanup later. Next, I lay out as much bacon as I can fit on the rack, usually about ten or eleven slices. It's okay if it overlaps a little because it will shrink up some as it cooks. Into the preheated oven it goes for fifteen to twenty minutes. The time depends on how you like your bacon. I know people who want it to “oink” when they pick it up and I know people who want it so crisp it shatters into bacon bits when they pick it up. I'm pretty much in the middle of the two extremes, so I start peeking into the oven after about fifteen minutes. No flipping necessary, I just put it in there and keep an eye on it. When it's done to my preference, I drain it on paper towels.

Now, what you have here is – are you ready for this? – precooked bacon! The same stuff they're going to charge you an arm and a leg for in the grocery store. All you need to do now is wait until it cools completely, then lay it out on the same sheet pan (assuming you've cooled and cleaned it) and stick it in the freezer for an hour or two to flash freeze it. Portion it out in single slices or in twos or threes or whatever and wrap the portions in wax paper or parchment paper. Stick the wrapped bacon in a zip lock bag and put it back in the freezer. It'll stay nice and tasty for two or three months.

When you want a quick bacon fix, take a portion out of the bag and microwave it for a few seconds. Or, if you're really super-prepared and all, you can put it in the fridge a couple of hours ahead of time to thaw. Now it's ready for your sandwich, your burger, your salad, your baked potato, your pizza, or you can scarf it down next to a couple of eggs or all by itself. Heat it up or not, depending on what you're going to do with it.

And all the while you're devouring your precooked portion of porcine pleasure, you can smile because you didn't fall prey to the latest time-saving-but-money-wasting marketing gimmick. Win-win!

You know, money can't buy happiness. But it can buy bacon, and that's close enough.

Thursday, May 25, 2023

Praise For Plain Pasta


Don't Overlook the Simple Pleasures


Mmmm, pasta. You ought to see my pantry. You'd swear I had stock in DeCecco and Barilla. I love pasta. And that love affair goes way back.

The very first pasta I remember eating was “wagon wheel” pasta made by La Rosa. I was four or five years old and my mother cooked it up and sauced it with nothing but butter and I was the happiest kid in the world. Fast forward several – ahem – decades, and if you still want to make me the happiest kid in the world, put a plate of plain buttered pasta in front of me. Works every time.

That's because plain pasta with butter and maybe a little Parmesan cheese is the most basic Italian comfort food. In Italy, it's called pasta al burro or sometimes pasta bianca. One of the most popular forms of the dish, pastina, has been in the news a lot lately because Ronzoni, one of the biggest manufacturers of pastina pasta in the US, stopped making the classic little star-shaped noodles back in February, causing widespread panic buying and hoarding. Sure, other companies produce it; Barilla markets it as both Pastina and Stelline. But Ronzoni had by far the biggest grocery store shelf presence for its pastina product and long-time customers were understandably miffed by its sudden absence. I mean, pastina is like the next step up from mother's milk for most Italian children. A little plain pasta, some butter, some cheese, and usually an egg. Okay, so my mom was weird starting me off on buttered rotelle. Must come from the French part of the family, I don't know.

I do know that when my own youngest son reached that pasta devouring age, it had to be plain pasta with butter. Never mind that most kiddie menus served up some form of spaghetti in tomato sauce. No, no! None of that for il mio bambino. If the pasta had even a trace of anything but plain butter on it, all bets were off. I recall a certain Old Spaghetti Factory in Atlanta that once dared to put brown butter on my kid's pasta. Wow! The way the acoustics in that place echoed, it was not a pleasant experience for anybody. Later on, six years of living in Italy expanded his palate quite a bit. But, like me, he still appreciates a good dish of plain pasta with butter and cheese.

Did you know that pasta al burro is the basis for fettuccine Alfredo? When you go to Italy, unless you're going to one of the tourist traps in Rome, don't bother ordering fettuccine Alfredo. They'll look at you like you've got a third eye. Instead, ask for pasta al burro or pasta bianca. They may still give you funny looks because that's a dish commonly served to children and folks with tummy troubles, but at least they'll know what you're talking about.

See, about a hundred years ago, a Roman restaurateur named Alfredo di Lelio had a very pregnant, very sick wife who could keep very little on her stomach. About all she could tolerate was Alfredo's pasta al burro, which he made with egregious amounts of butter and cheese for extra flavor. A couple of Hollywood luminaries, Douglas Fairbanks, Jr and Mary Pickford, were honeymooning in Rome and wandered into Alfredo's eatery. They inquired about the dish his wife was enjoying. Alfredo probably thought, “Boh. Americani pazzi.” But he dutifully served them some plain pasta with butter and cheese. And they LOVED it! They loved it so much that they went back to Hollywood and told everybody they knew – and they knew a lot of people – about the wonderful Italian dish they had in Rome. Fettuccine Alfredo, they called it, and thus was a culinary legend born.

Of course, American chefs didn't have access to the same quality ingredients Alfredo used in his restaurant, so they wound up bastardizing his simple creation, adulterating it with milk and cream and all kinds of extraneous additives to achieve what they thought was a close approximation. Sorry. No. Not even close. Nothing beats the silky, buttery unctuousness of the sauce that naturally forms when you briskly stir together plain hot pasta, high-fat butter, real Parmigiano-Reggiano cheese, and just a tiny bit of the water in which the pasta was cooked. Buonissimo! And far superior to anything you'll find in a jar.

There are another couple of variations on plain pasta. Pasta cacio e pepe is one. Plain pasta, some butter, some Parmigiano and pecorino cheeses, and a good dose of some freshly-ground black pepper. That's all you need in life, you know?

Unless you want to use olive oil instead of butter and throw in some garlic. Then you've got pasta aglio e olio. Another mouth watering dish that's just super simple.

If you want a different flavor profile, you might try pasta al limone. Same basic ingredients – pasta and butter with some lemon juice and lemon zest.

I suppose carbonara could be a “plain” pasta dish. I mean, it's pasta, butter and cheese with bacon and eggs mixed in, but with all the egg tempering and such, it's just too fussy when you're craving something quick and simple.

When I'm just too tired or too uninspired to prepare something complicated, I boil some water, SALT IT, add some pasta, cook until al dente, then ladle it into a pasta bowl, mix in some good quality butter – something like Kerrygold – and season it to taste. Then I kick back and enjoy it while watching TV or reading a book.

As to what kind of pasta? It doesn't really matter. Smaller shapes work best. Something rigate with a little texture to it is even better. Plain old spaghetti or linguine are fine, too. Tube-shaped pastas don't hold light sauces real well. Except ditalini. That one's small and it works okay in this application. Broad noodles like tagliatelle or pappardelle aren't really agreeable with buttery sauces, either. Doesn't mean you can't use them. Just keep extra napkins on hand if you do. I like farfalle or farfalline (aka “bowtie” pasta.) And, of course. I never turn down a bowlful of good ol' buttered wheels.

Rich, exotic, fragrant sauces are beautiful. I swoon over a good marinara or a flavorful amatriciana. A spicy arrabiata is a wonderful thing. And, of course, Bolognese is the gold standard of pasta sauces. But in the rush toward those long-cooking, preparation-heavy concoctions, don't overlook the simple pleasures to be found in a little plain pasta, some butter and some cheese.


Wednesday, September 21, 2022

A Few CHEAP And Easy Tips To Help Keep Your Kitchen Organized

One Man's Trash …

I've written a lot about kitchen and/or cooking organization because it's something I'm really passionate about. And if you've ever read anything I've written on any topic, you'll know I'm usually pretty cheap. Oh, I don't mind spending money on quality necessities, but I do object to spending big bucks on generally useless gadgets and geegaws that, more often than not, wind up in a junk drawer or a “donate to Goodwill” pile.

So let me share with you a few of my favorite cheap and easy ideas for keeping your kitchen neat and organized. You can call them “hacks”.....but I won't. I hate that over-used word for things we used to simply call “tips.”


Easy Appliance Cord Management

Appliance cords are a pain. You can try wrapping them up like the electricians do with their long extension cords. Or you can tie them up with rubber bands or something equally ineffective. Works okay until the rubber band stretches or breaks. I saw some cool-looking thingys on Amazon that looked like little cleats you can attach to your appliance and then wrap the cord around the cleat. Fine if you want a cleat permanently affixed to your toaster or mixer. And they're a bit pricey.

But if you nip down to a decent hardware place, you can pick up something called a “Cable Cuff.” I get mine at Home Depot, but I'm sure they have them elsewhere. Amazon's got 'em. It's an adjustable, reusable plastic clip that's intended to be an alternative to cable ties. It's got serrated teeth and a push-button release. You just wrap up your cord, slip on the cuff, clamp it shut, and.....that's it! Push the button to release the clamp when you want to use the appliance. They come in a variety of sizes to accommodate anything from a skinny little cord to a frickin' tow cable. Well.....maybe not a tow cable, but you get the idea. They're durable. I've had some of mine for years. And they're …. here's my favorite word....cheap. The mini size is about a dollar, the small and medium ones are less than two bucks, and you can get large ones for around three dollars. I wrap up extension cords with them and they live on my KitchenAid mixers (both hand and stand), my fryer, my griddle, my bread machines, my induction cooktop burners, my immersion blender, my immersion circulator, my Instant Pot, my air fryer – pretty much anything in my kitchen that has a cord. They are cheap, easy, and indispensable.

Free Appliance Slider Mat

Speaking of my KitchenAid mixer, that rascal is heavy! Depending on the model, super well-built KitchenAids, with their all-metal construction, weigh in anywhere between twenty and thirty pounds. And that's wonderful for performance and stability. But it's also hernia-inducing, especially if you're storing it on a lower shelf in you cabinet. My sister has one of those nifty spring-loaded lifters built in to her cabinet. When she wants to use her mixer, she can just lift the shelf it's stored on and lock it in place. A hundred, a hundred-fifty, two-hundred dollars for the convenience. No thanks. There's also a cheap plastic solution called a countertop slider. It's a two-piece gadget where the top part slides over the bottom part on little plastic rollers. The one I have is really cheap. It's one of those “As Seen on TV” things and I think I paid $9.99 for it. And I got what I paid for. I use it under my SodaStream because anything heavier than a pound or two just crushes it. It doesn't have a prayer of standing up to my KitchenAid. They also make a so-called “slider mat” just for heavy buggers like mixers and such. It's just a rubber mat with a grippy side on top and a slick side on the bottom. They run about ten to fifteen bucks on Amazon and at the big box stores.

OR...…if you're cheap like I am, just get a dish towel out of the drawer and spread it out on the shelf where you mixer lives. Fold it double if you want but just make sure you leave enough of the towel exposed that you can grab on to an end. Now set your half-ton appliance on it and easily slide the machine to the back of the shelf. When you want to use it, grab that end of the towel you left exposed and pull it forward. Slides like a dream. And it won't cost you a nickel. Of course, you'll still have to lift and lug the thing to wherever you're going to use it, but at least you won't have to wrestle with it in the depths of the cabinet, and that's half the battle won.

Cheap Prep Bowls


You know what prep bowls are right? They are the little bowls the pros use to.....hold their prep. You see them on the TV cooking shows all the time. And, wonder of wonders, you can use them at home, too! You can find sets of glass or metal prep bowls on Amazon or in those overpriced kitchen stores for anywhere from ten to twenty dollars a set. Or you can do what I do: recycle trash.

Surely at some point you've bought little single-serving, lunchbox-size plastic cups of applesauce or fruit or pudding or Jell-O or vegetables or something. Don't toss them in the trash when they're empty. Toss them in the sink, wash them up, and then use them for prep bowls. Most of them are a ½ cup capacity and they are perfect for holding your spices or other ingredients. I have stacks of them in my kitchens and they are an integral part of my mise en place. Whenever I'm cooking, there'll be rows of these little plastic cups containing measured amounts of butter or salt or pepper or sugar or oregano or minced garlic or chopped onions or carrots or whatever. And they're free! Can't get cheaper than that. You don't have to worry about breaking them or denting them like you do with the expensive ones. And if you do somehow mess one up, just go eat some more applesauce.

Cheap Pan Protectors … And More!

I have a pretty large collection of cookware. In years past, it hung on pot racks in my home kitchen like it did in my restaurant kitchens. But these days, I have one of those fancy cabinets with roll-out drawers under my main cooktop, so all my pots and pans currently live in there. Now, nothing will screw up the surface of a pan – especially a non-stick pan – like nesting or stacking it with another pan. The only thing worse is just throwing them all in a drawer like throwing cats in bag and seeing which ones come out unscathed.

I'd really rather still have my pots and pans hanging up, but since I have to stack them, I stack them with pot and pan protectors in between. These, too, can be pricey little dudes if you go online or to the kitchen place with the hyphenated name. Between ten and twenty smackers for as few as four of the silly things.

OR....you knew there was an “or,” didn't you?....you can hie yourself down to the dollar store and pick up a roll or two of non-slip padded plastic shelf liner. The rolls are a foot wide and five feet long. Do you know how many little padded pot and pan protectors you can make out of that? Lots. For just a little over a dollar. And you can cut them into whatever size and shape you want and need.

And while we're on the subject of non-slip padded shelf liner, it has some other handy kitchen uses. In culinary school, they teach you to slip a damp towel or cloth under your cutting board to keep it from slipping around. Well......the shelf liner in question is non-slip after all. Cut a section to fit under your cutting board and Bob's your uncle. (Actually, George was my uncle, but that just ruins a perfectly good British-ism.) And you know those little rubber/plastic doodads that you can buy or procure as promotional items from stores and insurance agents to help you get a grip and loosen the lid of a stubborn jar? Non-slip shelf liner works great for that purpose, too. Sometimes appliances like mixers and bread machines like to “walk” around on slick countertops. And if you don't catch them before they take that final step off the edge......well.....it ain't pretty. Been there, done that. But a nice hunk of non-slip shelf liner keeps those wandering appliances right where you put them. And, of course, you can use it to line your drawers and shelves, too. Great stuff. Versatile and cheap!

Free Silpat Storage

Do you have silpats in your kitchen? You know, silicone baking mats? If you don't, you should. They are a baker's dream and they're handy for other general cooking purposes, too. They come in sizes ranging from full-sheet to half-sheet to quarter sheet. They even come in rounds and octagons. And whatever size or shape they are, they are wretched things to store. Storing them flat is not a really good idea. They are very much prone to getting torn, scratched, melted or just generally damaged. And they are kinda expensive to replace. The good ones are, anyway. No, the most efficient way to store them is to roll them up. Here again, rubber bands are about useless. You'll be hunting a new rubber band every other time you use the silpat. String? Wire ties? Not so much. “They” (the manufacturers) make a gee-whiz little silpat storage band to protect your investment and it will only set you back about five bucks. Each. Let's see......I've got eight silpats, so that's......that's way more than I'm gonna spend.

SO......you can just recycle more trash. I'll bet you've been throwing those empty paper towel rolls in the ol' bin, haven't you? Tsk, tsk. Save those cardboard cylinders and stuff 'em with rolled up silpats. They fit perfectly, leaving an inch or so outside the tube for easy access. And if you have smaller mats, you can cut the cardboard rolls to size. And when they get raggedy after a few hundred uses, just wait until you run out of paper towels again and you've got a brand new silpat storage container.

One man's trash … can sure save you a lot of treasure. 

Tuesday, August 17, 2021

Time To Stop Wasting Sliced Deli Meat

Keep Your Lunch Meat Out Of The Landfill


Some time ago I wrote about a pretty slick trick for saving bacon. (Bacon Is A Terrible Thing To Waste, April 12, 2017) When there's just one or two of you a pound of bacon can spoil before you eat it all, so I suggested freezing it as a means of preserving it. Not too revolutionary a concept, right? But it was the way in which I froze it that was rather unique. Instead of throwing the whole shingled package into the freezer and then having to deal with trying to separate the slices as you need them, I rolled up each individual slice and froze them that way. Using that trick, you can get an entire pound of bacon into a quart freezer bag and you can take out a single slice or ten of them, depending on your needs, with no fuss or effort. Thaw them in the microwave for thirty seconds or so and you're ready to go.

Well, I found I was having the same issue with packaged deli meats. Deli meats go bad quickly once the packages are opened. You've only got a three to five-day window to use it up and as much as I like ham and cheese sandwiches, I really don't want to have one every day for a week. So once again, the freezer is the answer.

Most deli meats are sliced very thin. I knew throwing the whole package in the freezer was going to be as much of a pain as doing the same thing with bacon. So I tried separating the slices into portions. For example, I usually put four slices of ham on a ham and cheese, so I divided the package into four-slice portions, separated by deli paper, and froze them. It worked okay, but unless they were completely thawed, the thin slices tore as I tried to separate them. And since most packaged deli meats are “water added,” they get wet and messy when you thaw them. Okay. Back to the drawing board. I used the deli paper to separate the individual slices. Eh. All that got me was wet slices wrapped in wet deli paper when the meat was thawed.

And then the little light bulb came on: why not freeze the deli meat slices the same way as I froze the bacon strips?

I picked up an eight-ounce package of Hormel Natural Choice Sliced Smoked Deli Ham. I opened the pack and started to work, taking each slice and rolling it into a neat cylinder. The rolled cylinders went seam side down onto a sheet tray and then into the freezer. After about an hour they were set enough that they wouldn't unroll and they wouldn't stick together, so I removed them from the sheet tray and popped them into a freezer bag. I labeled the bag with the contents and the date, and it went back in the freezer. Now I had a nice little bag of frozen ham rolls. Next time I wanted a sandwich, I got the bag out of the freezer, selected four rolls, put them on a paper towel in the microwave for thirty seconds, and just like that, I had the makings for a nice lunch.

According to the USDA, “Lunch meat is safe indefinitely if kept frozen. Use it within one to two months for best quality.” I've never had a package of ham last me more than two months, so I can't testify to the verity of that statement, but it is certainly a better alternative than letting it go bad in the refrigerator after just a few days.

The same method works for chicken, turkey, roast beef and whatever else you get from your deli or packaged meat aisle. I will say this: it works a lot better with prepackaged meat like the aforementioned Hormel product. Or whatever your brand preference might be. Freshly sliced meat from your store's deli is a little more finicky. Especially poultry. Not a lot of water and not a lot of fat. My wife is a big fan of Boar's Head Ovengold Turkey. Let me tell you, that stuff shreds like a mad thing when it's sliced super thin, which is the way she likes it. Can you say “pulled turkey sandwich?” And freezing it the common way only exacerbates the problem. But it rolls up pretty well if you ask your deli person to separate it as it's being sliced and then process it as soon as you get it home before it has a chance to sit in the meat drawer of your refrigerator.

Hey, there's a lot of talk these days about food waste, so why not try a simple method to help keep your lunch meat out of the landfill? I know it takes a few minutes of tedious effort to roll up slices of ham or roast beef or whatever. (Rolling up bacon is extra fun because it's nice and greasy.) But the payoff is well worth the pain when you can just go to the freezer, unzip your Zip-Loc, and have nice, neat, perfectly portioned, mess-free little meat roll-ups right at hand for whatever your needs might be. It's an especially good idea if you want to save a few bucks by buying in larger quantities than you otherwise would. Think Sam's, Costco, or your local restaurant supply store. Instead of shelling out supermarket prices for little half-pound packages, buy two or three pounds, roll it up and freeze it. And you'll have quick and easy sandwiches for a couple of months.

As I wrote before, a great way to (literally) save your bacon can also work for your ham, roast beef, chicken or whatever you want to serve your family rather than your dog or your trash can. Saves food, saves money. Win-win situation. Try it today.

Sunday, August 8, 2021

Want Quick, Easy Bacon? Let George (Foreman) Do It!

I Don't Know Why I Didn't Think Of This Before


I have written quite a lot about bacon over the years. It's one of my favorite topics, to say nothing of its being one of my favorite foods. I've written about bacon in general and I've written about specific bacons. I've written about how to buy bacon, how to store bacon, and how to cook bacon. And it's that last topic that I want to address here.

I have previously noted that my favorite way to prepare the porcine ambrosia that is bacon is the simple, old-fashioned way: fry it up in a pan or on a flattop griddle. And for the most part, that remains true. That's the way my mama taught me almost sixty years ago, and it's still the best of the traditional methods. But what about some of the less traditional methods, hmmm?

Microwave ovens and their attendant gadgetry did not exist back when I first slapped a slice of bacon on a slab of steel. Do I have a microwave now? Yes. Do I have a microwave bacon cooker? Yes. Do I insert the latter into the former on a regular basis? No way. The only time I microwave bacon is if I'm in a desperate hurry or if I don't really care that it comes out with a case of chewy, dried-out rigor mortis. When I'm making bacon bits for a salad or a baked potato, I'll nuke up a couple of slices. Otherwise, almost never.

Another new-fangled cooking device is the air fryer, which is actually nothing more than a countertop convection oven. I wrote fairly recently about using this method to cook bacon, and I'm in favor of it. The major drawback is that you can only cook three or four slices at a time. Not too practical if you're cooking for a lot of people.

Now, when it comes to mass bacon cookery, nothing beats the tried and true restaurant method of putting it on a rack on a sheet pan and sticking it in the oven at 400° for fifteen to twenty minutes. You get nice, flat, crispy bacon with no turning or watching or babysitting. Maybe it's just my palate, but I can detect a slight flavor difference when it's made that way. Nothing that's a deal breaker, though. It's way better than the microwave method. Besides, my wife likes it that way and it's certainly easy. So I'm good with baking your bacon, too.

But here's my epiphany, and it's something that's been staring me in the face for years and I don't know why I didn't think of it before: let George do it.

Boxing legend George Foreman first stuck his name on an electric contact grill back in 1994. His “Lean Mean Fat-Reducing Grilling Machine” was an instant success and has gone through many iterations and upgrades since that first model. Which I still have, by the way. It's been supplanted for everyday use by one of the newer, bigger, more colorful jobs, but the original little white one I bought twenty-five or so years ago still works when I plug it in, a testament to its durability.

George (the grill, not the boxer) does all kinds of things in my kitchen, including making great grilled cheese sandwiches. I had recently put him to work doing just that and he was still sitting on the counter drying out and waiting to be put away last night when I got a hankering for some bacon. And I don't know why it took twenty-five years to occur to me, but it did. I was kind of tired, kind of in a hurry, and I didn't feel like hauling out the air fryer or waiting for the oven or cleaning up the griddle. And I wasn't desperate enough for the microwave. So I thought,“Hmmmm,” as I stood looking at George's shiny red surface. I did a quick Google search to see if anybody else had had the same thought. Caspita! Was I late to the party! Numerous George Foreman grill bacon recipes and videos immediately popped up in my search.

Armed with the knowledge that it could be done and how to do it, I preheated my machine, slipped three slices of bacon on the lower plate, closed the lid and walked away to do other prep. I went back two minutes later, lifted the lid, flipped the bacon, closed it up again and walked away for another two minutes. When I returned, I retrieved three of the prettiest slices of perfectly cooked bacon I had ever seen. They were as flat and as evenly cooked as if I had used the oven method, but it took about a third of the time. I like my bacon a little toward the crispy side but it was still nice and tender, not at all like the undesirable microwaved results.

Truth be told, bacon cooked this way still does not have the same.....character, I guess.....as good ol' pan or griddle-fried bacon. But there's something else it doesn't have: excessive fat. After all, that's the point of a “Lean Mean Fat-Reducing Grilling Machine.” The fat was all rendered out into the nifty little catch tray, making for a much simpler cleanup. So, while grilling bacon on a contact grill does not necessarily make it a “health food,” it does offer a nominally healthier alternative to frying. And it's certainly faster, easier, and cleaner.

Now, if this is something you've been doing for years and it wasn't really a big revelation to you, just roll your eyes, say “Duh!” and go read something else. Mi dispiace. I'm a little slow sometimes. But if I've opened even one eye to a delicious, easy, and sorta healthy way to cook that marvelous, magical meat that is bacon, then I've accomplished my mission.

Oh, man! I don't have any of my absolute favorite Benton's bacon in the house right now. I see a road trip to Madisonville, Tennessee coming on. And with a power inverter in my car, maybe I could plug George in while I'm driving and........nah. But don't be surprised if my hotel room smells like (sigh) bacon.